Administration of interested persons
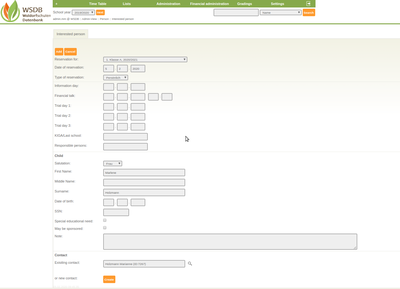
These instructions show how interested persons are created and further managed depending on their status. In the main menu under "+" you fill find the menu item "New interested person".
The form "Enter interested person data" contains the following information:
- Information about the reservation: Here you have to enter KIGA group or class for which the child would like to reserve, as well as the date and the type of reservation.
- "Information day" and "Financial talk" can be described individually of each school.
- All personal data relating to the child to be marked are entered in the child block.
- In the last block Contactperson either an already registered person has to be entered in the WSDB using search field or a new contact person has to be created for this child. It is recommended to create only one contact person for the child. With a later takeover, you still have the option to add contact persons to this person.
With the "Save" Button, the specified child is created as an interested person.
List of the interested persons:
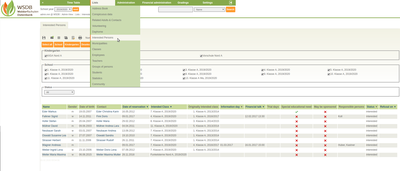
In the mani menu under "Lists" in the submenu "Interested persons", a complete list of all registered interested persons is created. The check marks are removed by "Deselect all". The respective group can then be selected and filtered.
At the top there are 6 icons that perform following functions:
![]() When you click on the Save button, the data of the selected persons are autmatically exported as a .CSV table. This .CSV table contains all the data required to create a form letter.
When you click on the Save button, the data of the selected persons are autmatically exported as a .CSV table. This .CSV table contains all the data required to create a form letter.
 When you click the Mailing button, a window opens to create and sent the email. The recipients are selected by name and can also be deselected individually by clicking on the preselection.
 When you click on the Label button, the address selection opens first. This is a list of all names from the selected interested persons. The names are selected and can also be deselected individually by clicking on the preselection. The button "print labels" is located above the list. If this button is clicked, a PDF with the addresses is automatically created. The position of the addresses is coordinated with a template.
 Clicking on the Form letter button opens a description including a form letter example. The template for the form letter is uploaded. Under "Create form letter" the addresses, salutations, etc. are inserted in the letter and the form letter is created and is immediately ready for printing.
![]() The list of interested persons can be edited by clicking on the edit list button.
The list of interested persons can be edited by clicking on the edit list button.
![]() By clicking on the Print button, a PDF with the relevant data is created from the selected interested person and can subsequently be printed.
By clicking on the Print button, a PDF with the relevant data is created from the selected interested person and can subsequently be printed.
There is a drop-down menu "Status" above the list. The list can be resorted and filtered based on a selected status from the list and then clicking the "Filter" button. The different statuses can be created individually depending on the school.
Edit list of interested persons:
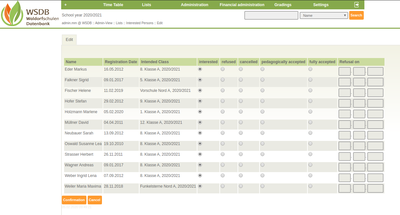
If you click on the "Edit list" ![]() icon, a list of all interested persons appears. Here you have the option to adjust the status and enter the respective date of change. The inputs are saved with the "Confirmation" button.
icon, a list of all interested persons appears. Here you have the option to adjust the status and enter the respective date of change. The inputs are saved with the "Confirmation" button.
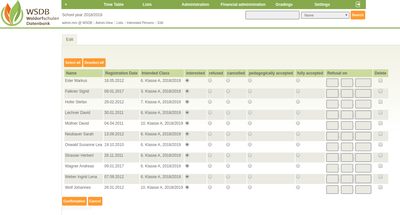
If you want to edit this list in a previous school year, there is another "Delete" column. If you tick the box for a person in this column, this data record of the person is delted.
Register a interested person as a KIGA child or a stundent:
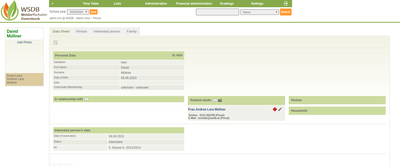
When a interested person is registered, click on the person's name in the interested person list. The data sheet for this selected person is displayed.
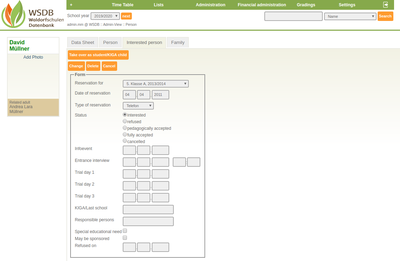
In the tab "Interested person" you get to the admission form. By clicking on the button "Take over as student/KIGA child", the processing process begins in order to register the student/KIGA child in the WSDB on a regular basis.
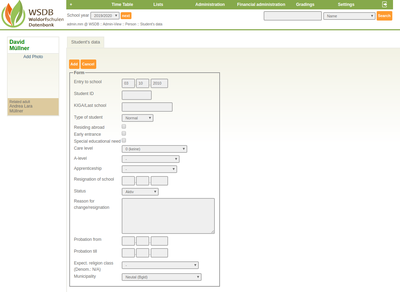
A second form then appears in which the school entry and further information about the student are entered. With "Save" the are accepted and you go to the next step.
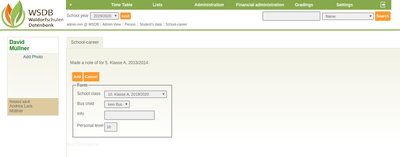
The KIGA group or class is then selected using the drop-down menu. It can also be noted whether the child is dependent on the bus or whether there is other information. The "Save" button saves the data and takes you to the last point required.
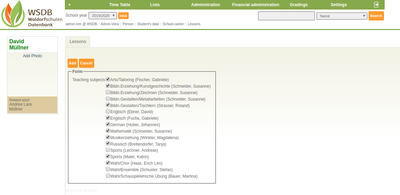
The next form shows the subjects of the selected class. Here there is the possibility to assign the person to the respective subejct. However, this can also be carried out at a later point in time or changed again. With the button "Save" the person is assigned to the subjects.
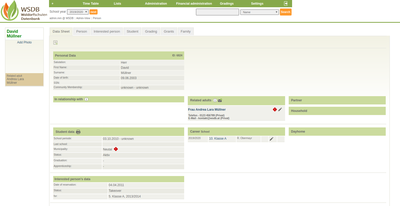
Nachdem alle Formulare erfolgreich ausgefüllt worden sind, gelangt man zum Datenblatt der jetzt aufgenommenen Person. Dieses Datenblatt enthält jetzt mehr Daten und wie man am folgenden Screenshots erkennen kann, wurde die Person bereits der 10. Klasse zugewiesen und der Interessentenstatus hat sich auf "Übernahme" geändert. Nun können noch weitere Informationen wie Adresse, Bezugspersonen usw. eintragen werden.


